Tuesday, March 31, 2026

TTS API 지연 문제 해결 방법: 실전 최적화 가이드 2024

TTS API 지연 문제 해결 방법: 실전 최적화 가이드 2024

TL;DR: TTS API의 지연 문제는 스트리밍 오디오 출력, 응답 캐싱, 비동기 처리, 그리고 적절한 API 제공업체 선택을 통해 효과적으로 줄일 수 있습니다.

TTS API 지연 문제란 무엇인가?

텍스트 음성 변환(TTS, Text-to-Speech) API는 현대 애플리케이션에서 없어서는 안 될 핵심 기술로 자리잡고 있습니다. 하지만 많은 개발자들이 TTS API를 실제 서비스에 적용할 때 가장 먼저 부딪히는 문제가 바로 지연(Latency)입니다. 사용자가 텍스트를 입력하거나 시스템이 텍스트를 전달한 후, 실제 음성이 재생되기까지 걸리는 시간이 길어지면 사용자 경험이 크게 저하됩니다.

지연 문제는 단순히 불편함을 넘어서, 실시간 대화형 AI 어시스턴트, 접근성 도구, 콘텐츠 읽기 서비스 등에서는 서비스 품질 자체를 좌우하는 치명적인 요소가 될 수 있습니다. 이 글에서는 TTS API 지연의 원인부터 실전 해결 방법까지 체계적으로 살펴보겠습니다.

TTS API 지연의 주요 원인 분석

문제를 해결하기 위해서는 먼저 원인을 정확히 파악해야 합니다. TTS API 지연은 크게 세 가지 영역에서 발생합니다.

네트워크 지연

클라이언트와 TTS API 서버 사이의 물리적 거리, 네트워크 혼잡도, DNS 조회 시간 등이 모두 지연에 영향을 미칩니다. 특히 해외 서버를 이용하는 경우 왕복 시간(RTT)이 수백 밀리초에 달할 수 있습니다.

모델 처리 시간

TTS 모델 자체의 추론 시간도 중요한 변수입니다. 고품질 신경망 기반 TTS 모델은 더 자연스러운 음성을 생성하지만, 그만큼 더 많은 연산이 필요합니다. 긴 텍스트일수록 처리 시간이 비례해서 늘어납니다.

오디오 전송 및 버퍼링

생성된 오디오 파일 전체가 완성된 후에야 전송이 시작되는 방식은 불필요한 대기 시간을 만들어냅니다. 이것이 스트리밍 방식이 중요한 이유입니다.

핵심 해결책 1: 스트리밍 오디오 출력 활용

TTS API 지연을 줄이는 가장 강력한 방법 중 하나는 스트리밍(Streaming)을 활용하는 것입니다. 전통적인 방식은 TTS 모델이 전체 오디오를 생성한 후 한 번에 전송하지만, 스트리밍 방식은 오디오가 생성되는 즉시 청크(chunk) 단위로 전송합니다.

예를 들어, OpenAI의 TTS API나 ElevenLabs 같은 서비스는 스트리밍 모드를 지원합니다. 아래는 Python을 사용한 스트리밍 TTS 구현 예시입니다.

import openai
import pyaudio

client = openai.OpenAI()

# 스트리밍 TTS 요청
with client.audio.speech.with_streaming_response.create(
    model="tts-1",
    voice="alloy",
    input="안녕하세요! TTS 스트리밍 예제입니다.",
) as response:
    # 청크 단위로 오디오 데이터 수신 및 재생
    p = pyaudio.PyAudio()
    stream = p.open(format=pyaudio.paInt16, channels=1, rate=24000, output=True)
    
    for chunk in response.iter_bytes(chunk_size=1024):
        stream.write(chunk)
    
    stream.stop_stream()
    stream.close()
    p.terminate()

이 방식을 사용하면 전체 오디오가 완성되기를 기다리지 않고 첫 번째 청크가 도착하는 즉시 재생을 시작할 수 있어, 체감 지연을 수초에서 수백 밀리초 수준으로 크게 줄일 수 있습니다.

핵심 해결책 2: 지능형 캐싱 전략

동일한 텍스트에 대해 매번 TTS API를 호출하는 것은 낭비입니다. 캐싱(Caching)을 통해 반복적으로 사용되는 음성 데이터를 저장하면 지연을 거의 제로에 가깝게 줄일 수 있습니다.

캐싱 구현 전략

• 텍스트 해시 기반 캐싱: 입력 텍스트의 MD5 또는 SHA256 해시를 키로 사용하여 오디오 파일을 저장합니다.

• CDN 활용: 캐시된 오디오 파일을 CDN에 배포하면 전 세계 사용자에게 빠르게 제공할 수 있습니다.

• TTL 설정: 음성 스타일이나 모델이 업데이트될 경우를 대비해 적절한 캐시 만료 시간을 설정합니다.

• 프리페치(Prefetch): 사용자가 다음에 요청할 가능성이 높은 텍스트를 미리 TTS로 변환해 캐시에 저장합니다.

import hashlib
import os
import json

CACHE_DIR = "./tts_cache"
os.makedirs(CACHE_DIR, exist_ok=True)

def get_cached_audio(text: str, voice: str = "alloy") -> bytes | None:
    cache_key = hashlib.md5(f"{text}_{voice}".encode()).hexdigest()
    cache_path = os.path.join(CACHE_DIR, f"{cache_key}.mp3")
    
    if os.path.exists(cache_path):
        with open(cache_path, "rb") as f:
            return f.read()
    return None

def save_to_cache(text: str, audio_data: bytes, voice: str = "alloy"):
    cache_key = hashlib.md5(f"{text}_{voice}".encode()).hexdigest()
    cache_path = os.path.join(CACHE_DIR, f"{cache_key}.mp3")
    
    with open(cache_path, "wb") as f:
        f.write(audio_data)
    print(f"캐시 저장 완료: {cache_key}")

핵심 해결책 3: 비동기 처리와 병렬 요청

긴 텍스트를 처리할 때는 텍스트를 여러 문장으로 분할하여 병렬로 TTS 요청을 보내는 방법이 효과적입니다. 비동기 프로그래밍을 활용하면 여러 청크를 동시에 처리하고 순서대로 재생할 수 있습니다.

Python의 `asyncio`와 `aiohttp`를 활용하거나, JavaScript에서는 `Promise.all()`을 사용하여 여러 TTS 요청을 병렬로 처리할 수 있습니다. 이 방법은 특히 뉴스 읽기, 오디오북 생성, 긴 문서 음성 변환 등에서 전체 처리 시간을 획기적으로 줄여줍니다.

텍스트 분할 최적화 팁

• 문장 단위로 분할하되, 너무 짧은 문장은 합쳐서 API 호출 횟수를 최소화합니다.

• 각 청크의 길이를 100~300자 사이로 유지하는 것이 최적입니다.

• 병렬 요청 수를 API 속도 제한(Rate Limit)에 맞게 조절합니다.

핵심 해결책 4: 올바른 모델과 API 선택

모든 TTS API가 동일한 지연 특성을 가지는 것은 아닙니다. 사용 목적에 맞는 모델과 API를 선택하는 것이 중요합니다.

실시간 대화형 애플리케이션을 구축한다면 지연에 최적화된 경량 모델(예: OpenAI의 `tts-1`)을 선택하세요. 반면 고품질 오디오가 필요한 콘텐츠 제작에는 품질 우선 모델(예: `tts-1-hd`)이 적합합니다.

또한, Anakin.ai와 같은 AI 플랫폼을 활용하면 다양한 TTS API를 하나의 인터페이스에서 테스트하고 비교할 수 있어, 자신의 서비스에 가장 적합한 API를 빠르게 찾을 수 있습니다. Anakin.ai는 비기술 사용자도 쉽게 AI 기능을 구축하고 실험할 수 있는 환경을 제공합니다.

지역별 API 엔드포인트 활용

일부 TTS API 제공업체는 여러 지역에 서버를 운영합니다. 사용자와 가장 가까운 지역의 엔드포인트를 선택하면 네트워크 지연을 크게 줄일 수 있습니다. 한국 사용자를 대상으로 하는 서비스라면 아시아 태평양 지역 서버를 우선적으로 활용하세요.

추가 최적화 전략

위의 핵심 전략 외에도 다음과 같은 추가적인 최적화 방법을 고려해보세요.

• WebSocket 활용: HTTP 요청 대신 WebSocket 연결을 유지하면 연결 설정 오버헤드를 줄일 수 있습니다.

• 오디오 포맷 최적화: MP3 대신 Opus 코덱을 사용하면 더 작은 파일 크기로 빠른 전송이 가능합니다.

• 로딩 인디케이터 UX: 기술적 지연을 완전히 없앨 수 없다면, 사용자에게 시각적 피드백을 제공하여 체감 대기 시간을 줄이세요.

• 엣지 컴퓨팅: 가능하다면 Cloudflare Workers와 같은 엣지 컴퓨팅 환경에서 TTS 처리를 수행하면 사용자와의 물리적 거리를 최소화할 수 있습니다.

자주 묻는 질문 (FAQ)

Q1. TTS API에서 허용 가능한 지연 시간은 어느 정도인가요?

실시간 대화형 애플리케이션에서는 300ms 이하의 첫 번째 오디오 청크 도착 시간이 이상적입니다. 일반적인 콘텐츠 재생 서비스에서는 1~2초의 지연도 허용 가능하지만, 사용자 경험을 위해서는 항상 최소화하는 것이 좋습니다. 스트리밍을 활용하면 대부분의 경우 첫 번째 오디오 재생까지의 시간을 500ms 이내로 줄일 수 있습니다.

Q2. 무료 TTS API와 유료 TTS API의 지연 차이는 얼마나 되나요?

일반적으로 유료 TTS API는 더 많은 서버 리소스와 최적화된 인프라를 제공하므로 지연이 현저히 낮습니다. 무료 API는 공유 리소스를 사용하는 경우가 많아 트래픽이 많을 때 지연이 크게 증가할 수 있습니다. 프로덕션 환경에서는 SLA(서비스 수준 협약)가 보장되는 유료 서비스를 사용하는 것을 권장합니다.

Q3. 로컬 TTS 모델을 사용하면 API 지연 문제를 완전히 해결할 수 있나요?

로컬 TTS 모델(예: Coqui TTS, Piper)을 사용하면 네트워크 지연은 완전히 제거할 수 있습니다. 그러나 로컬 하드웨어 성능에 따라 모델 추론 시간이 달라지며, 고품질 신경망 TTS 모델은 GPU가 없는 환경에서 오히려 더 느릴 수 있습니다. 데이터 프라이버시가 중요하거나 오프라인 환경에서 운영해야 하는 경우에는 로컬 모델이 좋은 선택입니다.


from Anakin Blog http://anakin.ai/blog/404/
via IFTTT

Friday, March 13, 2026

Stop Using Action Verbs in REST API URLs

Stop Using Action Verbs in REST API URLs

You've seen URLs like these:

GET /findUsersByEmail?email=user@example.com
POST /createOrder
GET /searchProducts?query=laptop
DELETE /removeItem?id=123

They look reasonable. They describe what the endpoint does. But they violate a fundamental REST principle: URLs should represent resources (nouns), not actions (verbs).

If your API uses action verbs in URLs, you're not building a REST API. You're building an RPC API with HTTP as the transport layer.

Here's why that matters and how to fix it.

Why Action Verbs Break REST

REST (Representational State Transfer) is built on resources. A resource is a thing—a user, an order, a product. Resources have representations (JSON, XML) and you transfer state by performing operations on them.

The HTTP method tells you the action: - GET = retrieve - POST = create - PUT = replace - PATCH = update - DELETE = remove

When you put action verbs in URLs, you're duplicating information that HTTP already provides. Worse, you're creating inconsistency.

Example: The Old Swagger Petstore

The classic Swagger Petstore includes these endpoints:

GET /pet/findByStatus?status=available
GET /pet/findByTags?tags=tag1,tag2

Both endpoints retrieve pets. The HTTP method (GET) already says "find" or "retrieve." Adding "findBy" to the URL is redundant.

This creates problems:

Inconsistency: Why is it /pet/findByStatus but /pet/{id} (not /pet/getById)? The pattern breaks down.

Scalability: What happens when you need to find by breed? Add /pet/findByBreed? Soon you have dozens of "find" endpoints.

Confusion: Is /pet/findByStatus different from /pet?status=available? They do the same thing but look different.

The Resource-Oriented Approach

REST APIs should be resource-oriented. URLs identify resources, HTTP methods specify actions.

Replace Action Verbs with Query Parameters

Instead of encoding the action in the URL, use query parameters:

Bad:

GET /findUsersByEmail?email=user@example.com
GET /findUsersByRole?role=admin
GET /findUsersByStatus?status=active

Good:

GET /users?email=user@example.com
GET /users?role=admin
GET /users?status=active

The URL identifies the resource (/users). Query parameters filter the collection. The HTTP method (GET) specifies the action (retrieve).

This approach scales. Need to filter by multiple criteria? Combine parameters:

GET /users?role=admin&status=active&created_after=2024-01-01

No new endpoints needed. The pattern is consistent and predictable.

Use HTTP Methods for Actions

HTTP methods provide all the verbs you need:

Bad:

POST /createOrder
POST /updateOrder
POST /deleteOrder

Good:

POST   /orders        ← Create
PUT    /orders/{id}   ← Replace
PATCH  /orders/{id}   ← Update
DELETE /orders/{id}   ← Remove

The URL identifies the resource. The method specifies the action. No redundancy.

Handle Complex Queries with the QUERY Method

Sometimes query parameters aren't enough. You need complex filters, sorting, pagination, and field selection. Encoding all this in the URL creates unwieldy strings.

For complex queries, use the QUERY method (RFC 9535):

QUERY /pets/search
Content-Type: application/json

{
  "filters": {
    "status": "AVAILABLE",
    "breed": "Golden Retriever",
    "age": {"min": 1, "max": 5},
    "vaccinated": true
  },
  "sort": [
    {"field": "age", "order": "asc"}
  ],
  "pagination": {
    "limit": 20,
    "cursor": "eyJpZCI6IjAxOWI0MTMyIn0"
  }
}

The QUERY method is semantically correct for searches. It allows a request body (unlike GET) and doesn't modify state (unlike POST).

The URL still identifies the resource (/pets). The method (QUERY) specifies the action (search). The request body contains the search criteria.

Common Patterns and How to Fix Them

Pattern 1: Create Actions

Bad:

POST /createUser
POST /addProduct
POST /registerCustomer

Good:

POST /users
POST /products
POST /customers

The POST method already means "create." Don't repeat it in the URL.

Pattern 2: Update Actions

Bad:

POST /updateUser?id=123
POST /modifyProduct?id=456

Good:

PUT   /users/123      ← Full replacement
PATCH /users/123      ← Partial update

Use PUT for full replacement, PATCH for partial updates. The method conveys the action.

Pattern 3: Delete Actions

Bad:

POST /deleteUser?id=123
GET /removeProduct?id=456

Good:

DELETE /users/123
DELETE /products/456

The DELETE method is explicit. Don't use GET or POST for deletions.

Pattern 4: Search Actions

Bad:

GET /searchProducts?query=laptop
POST /findUsers
GET /lookupOrders?id=123

Good:

GET /products?q=laptop              ← Simple search
QUERY /products/search              ← Complex search
GET /orders/123                     ← Lookup by ID

Use query parameters for simple searches, QUERY method for complex searches, and direct resource access for lookups.

Pattern 5: Bulk Actions

Bad:

POST /deleteMultipleUsers
POST /updateManyProducts

Good:

DELETE /users?ids=123,456,789
PATCH /products?ids=abc,def,ghi

Or use a batch endpoint:

POST /batch
Content-Type: application/json

{
  "operations": [
    {"method": "DELETE", "path": "/users/123"},
    {"method": "DELETE", "path": "/users/456"}
  ]
}

The batch approach is cleaner for complex multi-resource operations.

Pattern 6: State Transitions

Bad:

POST /approveOrder?id=123
POST /cancelSubscription?id=456
POST /activateUser?id=789

Good:

PATCH /orders/123
Content-Type: application/json

{"status": "APPROVED"}

State transitions are updates. Use PATCH with the new state.

For complex workflows, consider a sub-resource:

POST /orders/123/approval
POST /subscriptions/456/cancellation
POST /users/789/activation

This makes the action explicit while keeping the URL resource-oriented.

When Action Verbs Are Acceptable

There are rare cases where action verbs make sense:

1. Non-CRUD Operations

Some operations don't map to CRUD:

POST /orders/123/refund
POST /users/456/password-reset
POST /documents/789/convert

These are actions that don't fit the resource model. They're acceptable because they represent operations, not resources.

2. RPC-Style Endpoints

If you're building an RPC API (not REST), action verbs are fine:

POST /rpc/calculateShipping
POST /rpc/validateAddress
POST /rpc/generateReport

But be honest about what you're building. Don't call it REST if it's RPC.

3. Controller Resources

Some APIs use "controller" resources for actions:

POST /payments/123/capture
POST /emails/456/send
POST /jobs/789/retry

This is a middle ground. The URL is still resource-oriented (/payments/123) but includes an action sub-resource (/capture).

Real-World Examples

GitHub API

GitHub uses resource-oriented URLs:

Good:

GET /repos/{owner}/{repo}
POST /repos/{owner}/{repo}/issues
PATCH /repos/{owner}/{repo}/issues/{number}

Not:

GET /getRepository
POST /createIssue
POST /updateIssue

Stripe API

Stripe follows REST principles:

Good:

GET /customers
POST /customers
GET /customers/{id}
DELETE /customers/{id}

Not:

POST /createCustomer
POST /deleteCustomer

Modern PetStore API

The Modern PetStore API fixes the old Petstore's mistakes:

Old Petstore (Bad):

GET /pet/findByStatus?status=available
GET /pet/findByTags?tags=tag1,tag2

Modern PetStore (Good):

GET /pets?status=AVAILABLE
GET /pets?tags=tag1,tag2
QUERY /pets/search

How to Refactor Your API

If your API uses action verbs, here's how to refactor:

Step 1: Identify Resources

List all your endpoints and identify the underlying resources:

/createUser → resource: users
/findProducts → resource: products
/updateOrder → resource: orders

Step 2: Map Actions to HTTP Methods

Match each action to the appropriate HTTP method:

createUser → POST /users
findProducts → GET /products
updateOrder → PATCH /orders/{id}

Step 3: Use Query Parameters for Filters

Replace action-based endpoints with filtered resource endpoints:

/findProductsByCategory → GET /products?category=electronics
/searchUsersByEmail → GET /users?email=user@example.com

Step 4: Version Your API

If you're refactoring an existing API, version it:

Old: GET /v1/findProducts
New: GET /v2/products

This lets you migrate clients gradually without breaking existing integrations.

Step 5: Document the Changes

Provide clear migration guides:

## Migration Guide: v1 to v2

### Finding Products

**v1 (Deprecated)**:
GET /v1/findProducts?category=electronics

**v2**:
GET /v2/products?category=electronics

Testing Your API Design

Use these questions to evaluate your URLs:

  1. Does the URL identify a resource? If not, refactor.
  2. Does the HTTP method specify the action? If not, you're duplicating information.
  3. Can you explain the endpoint without using verbs? If not, it's probably not resource-oriented.
  4. Is the pattern consistent across all endpoints? If not, simplify.

Conclusion

Action verbs in URLs are a code smell. They indicate you're building RPC, not REST.

REST APIs should be resource-oriented: - URLs identify resources (nouns) - HTTP methods specify actions (verbs) - Query parameters filter collections - The QUERY method handles complex searches

This approach creates consistent, scalable, predictable APIs that developers love.

The Modern PetStore API demonstrates these principles in action. Every endpoint follows the resource-oriented pattern. No action verbs. No inconsistency. Just clean, RESTful design.

Want to see it in practice? Check out the Modern PetStore API documentation at docs.petstoreapi.com.


from Anakin Blog http://anakin.ai/blog/stop-using-action-verbs-in-urls/
via IFTTT

Why the Old Swagger Petstore Is Teaching You Bad API Design

Why the Old Swagger Petstore Is Teaching You Bad API Design

For over a decade, developers learning OpenAPI have started with the same example: the Swagger Petstore. It's been the go-to tutorial for understanding API specifications. But here's the problem—this widely-used example teaches anti-patterns that developers carry into production systems.

The old Petstore doesn't follow basic RESTful design principles. If you learned API design from it, you might be building APIs the wrong way.

The Three Critical Violations

1. Inconsistent Resource Naming

The old Petstore mixes singular and plural resource names:

GET /pet/{id}           ← Singular
GET /store/inventory    ← Plural
POST /user              ← Singular

This inconsistency creates confusion. Should you use /pet/123 or /pets/123? The answer: always use plural for collections.

Here's why plural wins:

Consistency across operations. When you use /pets, it works for both collections and individual resources: - GET /pets returns all pets - GET /pets/123 returns one pet - POST /pets creates a pet - PUT /pets/123 updates a pet

Clearer semantics. /pets/123 reads as "pet 123 from the pets collection." /pet/123 reads awkwardly.

Industry standard. GitHub uses /repos, Stripe uses /customers, Twitter uses /tweets. The pattern is established.

The Modern PetStore API fixes this:

GET /pets/{id}
GET /orders/{id}
GET /users/{id}

Every resource uses plural naming. No exceptions.

2. Action Verbs in URLs

The old Petstore includes endpoints like:

GET /pet/findByStatus?status=available
GET /pet/findByTags?tags=tag1,tag2

This violates a core REST principle: URLs should represent resources (nouns), not actions (verbs).

The HTTP method already tells you the action: - GET = retrieve - POST = create - PUT = update - DELETE = remove

Adding "find" to the URL is redundant. Worse, it creates inconsistency. Why is it /pet/findByStatus but not /pet/getById?

The correct approach uses query parameters:

GET /pets?status=available
GET /pets?tags=tag1,tag2

For complex searches that don't fit query parameters, use the QUERY method:

QUERY /pets/search
Content-Type: application/json

{
  "filters": {
    "status": "AVAILABLE",
    "breed": "Golden Retriever",
    "age": {"min": 1, "max": 5}
  }
}

The QUERY method (RFC 9535) is designed for complex queries that need a request body. It's semantically correct and avoids URL bloat.

3. Wrong HTTP Status Codes

The old Petstore returns incorrect status codes:

POST /pet
Response: 200 OK

DELETE /pet/{id}
Response: 200 OK with body

Both are wrong.

Creating resources should return 201 Created, not 200 OK. The 201 status tells clients a new resource exists and includes its location in the Location header:

POST /pets
Response: 201 Created
Location: /pets/019b4132-70aa-764f-b315-e2803d882a24

{
  "id": "019b4132-70aa-764f-b315-e2803d882a24",
  "name": "Max",
  "status": "AVAILABLE"
}

Deleting resources should return 204 No Content, not 200 OK. The 204 status indicates success without a response body. Returning 200 with a body wastes bandwidth and creates confusion—what should the body contain?

DELETE /pets/019b4132-70aa-764f-b315-e2803d882a24
Response: 204 No Content

The Modern PetStore API uses correct status codes throughout: - 200 OK for successful GET/PUT with body - 201 Created for successful POST - 204 No Content for successful DELETE - 400 Bad Request for client errors - 422 Unprocessable Entity for validation errors - 500 Internal Server Error for server failures

What Else Is Missing?

Beyond the three critical violations, the old Petstore lacks features you need in production:

No Standard Error Format

The old Petstore returns generic error messages with no structure. Modern APIs use RFC 9457 Problem Details:

{
  "type": "https://petstoreapi.com/errors/validation-error",
  "title": "Validation Error",
  "status": 422,
  "detail": "The request body contains validation errors",
  "instance": "/v1/pets",
  "errors": [
    {
      "field": "name",
      "message": "Name is required"
    }
  ]
}

This format is standardized, machine-readable, and includes enough context for debugging.

No Pagination

The old Petstore returns all results in one response. This doesn't scale. What happens when you have 10,000 pets?

Modern APIs use cursor-based pagination:

GET /pets?limit=20&cursor=eyJpZCI6IjAxOWI0MTMyIn0

Response:
{
  "data": [...],
  "pagination": {
    "nextCursor": "eyJpZCI6IjAxOWI0MTUzIn0",
    "hasMore": true
  }
}

Cursor pagination scales to millions of records without performance degradation.

No Rate Limiting

Production APIs need rate limiting to prevent abuse. The Modern PetStore API includes standard rate limit headers:

X-RateLimit-Limit: 1000
X-RateLimit-Remaining: 999
X-RateLimit-Reset: 1678886400

Clients can adjust their behavior before hitting limits.

No Versioning Strategy

The old Petstore doesn't address versioning. How do you introduce breaking changes?

Modern APIs version through the URL:

GET /v1/pets/{id}
GET /v2/pets/{id}

Or through headers:

GET /pets/{id}
Accept: application/vnd.petstore.v2+json

Both approaches work. Pick one and stick with it.

No Security Model

The old Petstore has minimal security examples. Modern APIs need:

OAuth 2.0 with scopes:

security:
  - oauth2:
    - read:pets
    - write:pets

API key authentication:

Authorization: Bearer sk_live_abc123...

Rate limiting per user:

X-RateLimit-Limit: 1000
X-RateLimit-Remaining: 999

Security isn't optional in production.

How Modern PetStore API Fixes Everything

The Modern PetStore API was built to demonstrate correct API design:

RESTful URLs

GET    /pets              ← List all pets
POST   /pets              ← Create a pet
GET    /pets/{id}         ← Get one pet
PUT    /pets/{id}         ← Update a pet
DELETE /pets/{id}         ← Delete a pet
GET    /pets?status=AVAILABLE  ← Filter pets

Every URL follows REST principles. No action verbs. Consistent plural naming.

Correct Status Codes

  • 200 OK for successful reads and updates
  • 201 Created for successful creates
  • 204 No Content for successful deletes
  • 400 Bad Request for malformed requests
  • 401 Unauthorized for missing auth
  • 403 Forbidden for insufficient permissions
  • 404 Not Found for missing resources
  • 422 Unprocessable Entity for validation errors
  • 429 Too Many Requests for rate limiting
  • 500 Internal Server Error for server failures

Standard Error Format (RFC 9457)

{
  "type": "https://petstoreapi.com/errors/not-found",
  "title": "Resource Not Found",
  "status": 404,
  "detail": "Pet with ID 019b4132-70aa-764f-b315-e2803d882a24 not found",
  "instance": "/v1/pets/019b4132-70aa-764f-b315-e2803d882a24"
}

Cursor-Based Pagination

{
  "data": [...],
  "pagination": {
    "nextCursor": "eyJpZCI6IjAxOWI0MTUzIn0",
    "prevCursor": "eyJpZCI6IjAxOWI0MTMyIn0",
    "hasMore": true
  }
}

OAuth 2.0 Security

components:
  securitySchemes:
    oauth2:
      type: oauth2
      flows:
        authorizationCode:
          authorizationUrl: https://auth.petstoreapi.com/oauth/authorize
          tokenUrl: https://auth.petstoreapi.com/oauth/token
          scopes:
            read:pets: View pet information
            write:pets: Manage pets

Rate Limiting

X-RateLimit-Limit: 1000
X-RateLimit-Remaining: 999
X-RateLimit-Reset: 1678886400
Retry-After: 60

What You Should Do

If you're building a new API:

  1. Use plural resource names (/pets, not /pet)
  2. Keep actions in HTTP methods (GET, POST, PUT, DELETE)
  3. Return correct status codes (201 for creates, 204 for deletes)
  4. Implement RFC 9457 error format
  5. Add cursor-based pagination
  6. Include rate limiting headers
  7. Version your API (URL or header-based)
  8. Use OAuth 2.0 or API keys for authentication

If you're maintaining an existing API:

  1. Audit your endpoints for RESTful violations
  2. Document breaking changes in your changelog
  3. Version new endpoints that fix design issues
  4. Deprecate old endpoints with sunset headers
  5. Migrate clients gradually to new patterns

Don't break existing clients, but stop propagating bad patterns.

The Bigger Picture

The old Swagger Petstore served its purpose as a simple teaching tool. But "simple" became "simplistic." It taught a generation of developers that REST is just HTTP + JSON.

REST is more than that. It's a set of architectural constraints that make APIs scalable, maintainable, and predictable.

The Modern PetStore API shows what's possible when you apply those constraints correctly. It's not just an example—it's a reference implementation you can learn from and build upon.

Your API is your product's interface to the world. Design it well.

Key Takeaways

  • The old Swagger Petstore violates basic RESTful principles
  • Use plural resource names consistently (/pets, not /pet)
  • Keep action verbs out of URLs—use HTTP methods instead
  • Return correct status codes (201 for creates, 204 for deletes)
  • Implement standard error formats (RFC 9457)
  • Add pagination, rate limiting, and proper security
  • The Modern PetStore API demonstrates correct patterns


from Anakin Blog http://anakin.ai/blog/swagger-petstore-teaches-bad-design/
via IFTTT

Thursday, March 12, 2026

gRPC vs REST: Performance Comparison and When to Switch

gRPC vs REST: Performance Comparison and When to Switch

Performance differences between gRPC and REST are significant. In benchmarks, gRPC often delivers 5-10x faster performance. Understanding when these differences matter helps you make informed architecture decisions.

Performance Benchmarks

Real numbers reveal the difference. These benchmarks compare equivalent operations.

Response size comparison:

A pet object in JSON:

{
  "id": "12345",
  "name": "Buddy",
  "status": "available",
  "category": { "id": "1", "name": "dogs" },
  "tags": ["friendly", "trained"]
}

JSON size: 112 bytes.

Same data as Protocol Buffer: 28 bytes.

That's 75% smaller. Over millions of requests, bandwidth savings are substantial.

Latency comparison:

Operation REST (JSON) gRPC Improvement
Get single pet 12ms 3ms 4x faster
List 100 pets 45ms 11ms 4x faster
Complex nested query 120ms 25ms 5x faster

These numbers come from controlled benchmarks. Real-world improvements vary based on network and payload complexity.

Throughput comparison:

Metric REST gRPC
Requests/second 2,500 15,000
Concurrent connections 100 10,000

gRPC handles 6x more requests per second. The HTTP/2 advantage shows at scale.

Why the Difference?

Multiple factors create the performance gap.

Serialization speed:

JSON parsing requires string manipulation, character decoding, and type conversion. Protocol Buffers decode binary directly into structures. The difference can be 10x or more.

HTTP/2 vs HTTP/1.1:

HTTP/1.1 opens a new TCP connection for each request. HTTP/2 reuses connections. Setting up connections takes time, especially over TLS.

HTTP/2 also supports multiplexing. Multiple requests travel on one connection simultaneously. No head-of-line blocking.

HTTP/2 header compression (HPACK) reduces overhead significantly.

Connection reuse:

REST clients often create new connections or use connection pooling. gRPC maintains connections persistently. Connection management overhead disappears.

Message framing:

JSON requires delimiters and quotes around strings. Numbers and booleans have specific syntax. Protocol Buffers use efficient binary encoding. Less data travels the network.

When Performance Matters Enough to Switch

gRPC's complexity is only worth it when performance truly matters.

High-traffic microservices - Services calling services thousands of times per second benefit most. Each millisecond saved multiplied by millions of calls adds up.

Real-time applications - Streaming RPCs handle live data efficiently. REST polling or Server-Sent Events add overhead.

Mobile applications - Limited bandwidth and cellular latency amplify benefits. Smaller payloads and fewer round trips matter on mobile networks.

IoT and sensor networks - Devices sending frequent small messages benefit from compact encoding. Battery-powered devices save power.

Low-latency requirements - Trading systems, gaming servers, and live collaboration tools need every millisecond. gRPC delivers.

When to Stick with REST

REST remains the right choice for many scenarios.

Public APIs - External developers need easy integration. REST's ubiquity makes adoption frictionless. gRPC's learning curve is too steep for broad adoption.

Simple CRUD operations - REST maps directly to create, read, update, delete. No need for gRPC complexity.

Browser-based clients - gRPC-Web exists but has limitations. REST or GraphQL works better for web applications.

Development speed - JSON is human-readable. Debugging REST APIs is simpler. When time-to-market matters, REST's simplicity wins.

Standard integrations - Many services provide REST APIs. Building integrations is straightforward. gRPC requires more setup.

Migration Strategy

If you decide to switch, migrate gradually.

1. Start with internal services

Migrate service-to-service communication first. These don't affect external users. You control both sides of the interface.

2. Use gRPC alongside REST

Keep REST endpoints. Add gRPC for performance-critical paths. Users migrate gradually.

# Try gRPC first, fall back to REST
try:
    result = grpc_client.get_pet(id)
except:
    result = rest_client.get(f'/api/pets/{id}')

3. Update clients gradually

Generate gRPC clients for new applications. Update existing clients over time. No big-bang migrations.

4. Monitor performance

Track latency and error rates. Ensure gRPC delivers expected improvements. Roll back if issues appear.

Code Comparison

See the difference in practice.

REST:

// Fetch pet with orders
const response = await fetch('/api/pets/123');
const pet = await response.json();

const ordersResponse = await fetch(`/api/pets/123/orders`);
const orders = await ordersResponse.json();

// Total: 2+ requests, potential over-fetching, ~15ms

gRPC:

# Same operation
response = stub.GetPetWithOrders(petstore.GetPetRequest(id='123'))

# Total: 1 request, exact data needed, ~3ms

The gRPC code is simpler. The request returns exactly what you need. Performance is significantly better.

Implementation Considerations

gRPC requires more setup than REST.

Code generation:

protoc --python_out=. petstore.proto

Generate code in each language you use. Maintain .proto files as the source of truth.

Connection management:

channel = grpc.secure_channel('api.petstoreapi.com:443', grpc.ssl_channel_credentials())
stub = petstore_pb2_grpc.PetServiceStub(channel)

# Reuse channel across calls
for id in pet_ids:
    pet = stub.GetPet(petstore.GetPetRequest(id=id))

Error handling:

try:
    response = stub.GetPet(request)
except grpc.RpcError as e:
    if e.code() == grpc.StatusCode.NOT_FOUND:
        handle_not_found()
    else:
        handle_error(e)

Pet Store API: Both Options

The Pet Store API offers both REST and gRPC interfaces. Use REST for simplicity and broad compatibility. Use gRPC for performance-critical applications.

The documentation at docs.petstoreapi.com includes:

  • Protocol buffer definitions
  • gRPC service definitions
  • Code generation examples
  • Performance tuning tips

Choose based on your specific requirements. For most applications, REST is sufficient. When milliseconds matter, gRPC delivers.


from Anakin Blog http://anakin.ai/blog/grpc-vs-rest-performance/
via IFTTT

Wednesday, March 11, 2026

How to Install OpenClaw (Moltbot/Clawdbot) on macOS, Windows, Linux, VPS, and Raspberry Pi

TL;DR

How to Install OpenClaw (Moltbot/Clawdbot) on macOS, Windows, Linux, VPS, and Raspberry Pi

OpenClaw runs on macOS, Linux, and Windows (via WSL). You need Node.js 18+ and an AI model API key. Installation takes under 10 minutes on most platforms. This guide covers every setup scenario: local machines, VPS providers like DigitalOcean and Hetzner, and even Raspberry Pi deployments.

Prerequisites

Before installing OpenClaw on any platform, you need:

  1. Node.js 18 or higher - OpenClaw is built on Node.js. Version 18 is the minimum. Version 20 LTS is recommended for stability
  2. npm or yarn - Comes bundled with Node.js
  3. Git - For cloning the repository
  4. An AI model API key - At least one of: OpenAI, Anthropic, Google, or a local Ollama setup
  5. 8GB+ RAM - Minimum for running OpenClaw with cloud models. 16GB+ if using local models through Ollama

Installing on macOS

macOS is the most straightforward platform for OpenClaw. Most contributors develop on Mac, so it gets the most testing.

Step 1: Install Node.js

Using Homebrew (recommended):

brew install node@20

Or download directly from nodejs.org.

Verify installation:

node --version  # Should show v20.x.x or higher
npm --version   # Should show 10.x.x or higher

Step 2: Install OpenClaw

npm install -g openclaw

Step 3: Run onboarding

openclaw onboard

The onboarding wizard walks you through: - Choosing your AI provider (OpenAI, Anthropic, Google, Ollama) - Entering your API key - Selecting messaging integrations (WhatsApp, Telegram, Slack, Discord) - Configuring the heartbeat schedule

Step 4: Start the agent

openclaw start

Your agent is now running. Send it a message through your configured messaging app.

Installing on Linux

OpenClaw runs on Ubuntu, Debian, Fedora, Arch, and most other distributions.

Step 1: Install Node.js

Using NodeSource (Ubuntu/Debian):

curl -fsSL https://deb.nodesource.com/setup_20.x | sudo -E bash -
sudo apt-get install -y nodejs

Using dnf (Fedora):

sudo dnf install nodejs

Step 2: Install build tools

Some dependencies need compilation:

# Ubuntu/Debian
sudo apt-get install -y build-essential python3

# Fedora
sudo dnf groupinstall "Development Tools"

Step 3: Install and configure OpenClaw

npm install -g openclaw
openclaw onboard
openclaw start

Step 4: Run as a background service (recommended)

Create a systemd service so OpenClaw survives reboots:

sudo tee /etc/systemd/system/openclaw.service << 'EOF'
[Unit]
Description=OpenClaw AI Agent
After=network.target

[Service]
Type=simple
User=your-username
WorkingDirectory=/home/your-username
ExecStart=/usr/bin/openclaw start
Restart=always
RestartSec=10
Environment=NODE_ENV=production

[Install]
WantedBy=multi-user.target
EOF

sudo systemctl enable openclaw
sudo systemctl start openclaw

Check status:

sudo systemctl status openclaw

Installing on Windows

OpenClaw doesn't run natively on Windows. You need WSL (Windows Subsystem for Linux).

Step 1: Enable WSL

Open PowerShell as Administrator:

wsl --install

This installs Ubuntu by default. Restart your computer when prompted.

Step 2: Set up Ubuntu in WSL

Open the Ubuntu terminal and update packages:

sudo apt update && sudo apt upgrade -y

Step 3: Follow the Linux installation steps

From here, follow the Linux instructions above. Install Node.js, build tools, and OpenClaw inside WSL.

Important notes for Windows users:- OpenClaw runs inside WSL, not in native Windows - File paths use Linux format (/home/user/ not C:\Users\) - iMessage integration doesn't work on Windows (macOS only) - Performance is comparable to native Linux

Setting up on a VPS

Running OpenClaw on a VPS gives you 24/7 uptime without keeping your laptop on. Popular choices are DigitalOcean and Hetzner.

Provider Plan RAM CPU Cost/month
DigitalOcean Basic Droplet 2GB 1 vCPU $12
Hetzner CX22 4GB 2 vCPU ~$4.50
Hetzner CX32 8GB 4 vCPU ~$7.50

For cloud AI models (GPT-4, Claude), 2GB RAM is enough. For local models via Ollama, get at least 8GB.

DigitalOcean setup

  1. Create a Droplet with Ubuntu 22.04
  2. SSH into your server: ssh root@your-server-ip
  3. Create a non-root user:
adduser openclaw
usermod -aG sudo openclaw
su - openclaw
  1. Follow the Linux installation steps above
  2. Set up the systemd service for auto-restart

Hetzner setup

Same process as DigitalOcean. Hetzner offers better pricing for European users.

  1. Create a server with Ubuntu 22.04
  2. SSH in and create a non-root user
  3. Install Node.js and OpenClaw
  4. Configure systemd service

VPS-specific tips

  • Use a firewall: Only open ports you need (SSH on 22, and any messaging webhook ports)
  • Set up fail2ban: Protects against brute-force SSH attacks
  • Enable automatic security updates: sudo apt install unattended-upgrades
  • Monitor resource usage: htop to check CPU and RAM

Setting up on a Raspberry Pi

Yes, OpenClaw runs on a Raspberry Pi. It's a popular choice for an always-on, low-power AI agent.

  • Raspberry Pi 4 (4GB) - Minimum for cloud AI models
  • Raspberry Pi 4 (8GB) - Recommended if you want to try small local models
  • Raspberry Pi 5 - Best performance
  • 32GB+ SD card - Or better, use an SSD via USB for reliability

Installation steps

  1. Flash Raspberry Pi OS (64-bit) using Raspberry Pi Imager
  2. Boot and connect via SSH
  3. Install Node.js:
curl -fsSL https://deb.nodesource.com/setup_20.x | sudo -E bash -
sudo apt-get install -y nodejs build-essential
  1. Install OpenClaw:
npm install -g openclaw
openclaw onboard
  1. Set up systemd service (same as Linux VPS)

Pi-specific considerations

  • Use cloud models: Local LLMs are too slow on Pi hardware
  • Swap space: Add 2GB swap if using the 4GB model
sudo fallocate -l 2G /swapfile
sudo chmod 600 /swapfile
sudo mkswap /swapfile
sudo swapon /swapfile
  • Cooling: OpenClaw can spike CPU during heavy tasks. Use a heatsink or fan case
  • Power: Use the official power supply. Underpowered Pi causes random crashes

Do you need a Mac Mini?

No. A Mac Mini is popular for OpenClaw because it's always-on, quiet, and energy-efficient, but it's not required.

OpenClaw runs on: - Any Mac (MacBook, iMac, Mac Mini, Mac Studio) - Any Linux machine - Windows via WSL - VPS servers - Raspberry Pi

The Mac Mini is a good choice if you want iMessage integration (macOS only) and a dedicated always-on device. A $12/month VPS does the same job for everything except iMessage.

If you don't want to manage any hardware, Anakin offers cloud-hosted AI agents with the same capabilities. No installation, no maintenance, no server costs beyond your subscription.

Node.js requirements

Minimum version: Node.js 18 Recommended version: Node.js 20 LTS

Check your version:

node --version

If you're on an older version, upgrade:

macOS (Homebrew):

brew upgrade node

Linux (NodeSource):

curl -fsSL https://deb.nodesource.com/setup_20.x | sudo -E bash -
sudo apt-get install -y nodejs

Using nvm (any platform):

nvm install 20
nvm use 20

Common Node.js issues: - Node 16 or lower: OpenClaw won't start. Upgrade to 18+ - Multiple Node versions: Use nvm to manage versions - Permission errors on npm install -g: Use nvm instead of system Node, or fix npm permissions

Fixing "command not found" after installation

This is the most common installation issue. You installed OpenClaw but your terminal can't find it.

Cause: npm's global bin directory isn't in your PATH.

Fix 1: Find where npm installed it

npm list -g --depth=0
npm bin -g

Fix 2: Add to PATH

# Add to ~/.bashrc or ~/.zshrc
export PATH="$(npm bin -g):$PATH"

# Reload shell
source ~/.bashrc  # or source ~/.zshrc

Fix 3: Use npx instead

npx openclaw start

Fix 4: Reinstall with nvm

nvm handles PATH automatically:

curl -o- https://raw.githubusercontent.com/nvm-sh/nvm/v0.39.0/install.sh | bash
nvm install 20
npm install -g openclaw

API keys and subscriptions you need

OpenClaw requires at least one AI provider API key:

Provider How to get key Free tier? Cost
OpenAI platform.openai.com $5 credit for new accounts ~$0.01-0.06 per 1K tokens
Anthropic console.anthropic.com Limited free tier ~$0.003-0.075 per 1K tokens
Google ai.google.dev Free tier available Pay per token after free tier
Ollama ollama.com Completely free Your hardware costs only

Optional subscriptions for messaging:- WhatsApp Business API - Free for low volume, paid for high volume - Telegram Bot - Free - Slack Bot - Free for basic usage - Discord Bot - Free

Tip: Start with OpenAI's GPT-3.5 Turbo for testing. It's the cheapest cloud option. Upgrade to GPT-4 or Claude once your workflows are stable.

Or skip API key management entirely with Anakin, which bundles model access into a single platform with 150 free credits to start.

A simpler alternative with Anakin

OpenClaw is powerful but requires technical setup: servers, API keys, Node.js, systemd services, and ongoing maintenance.

If you want AI agent capabilities without the infrastructure overhead, Anakin offers:

  • No installation - Runs in the cloud
  • All models included - GPT-4, Claude, Gemini, Stable Diffusion in one place
  • Visual workflow builder - Create agent logic without code
  • Built-in integrations - Connect to Slack, APIs, and databases
  • Team collaboration - Shared workspaces and credit management

Try it free with 150 credits included. Start building your AI agent today.

FAQ

Q: Can I install OpenClaw without Node.js?No. OpenClaw is a Node.js application. You need Node.js 18+ to run it.

Q: Does OpenClaw work on ARM processors?Yes. It runs on ARM-based Macs (M1/M2/M3/M4) and ARM Linux (Raspberry Pi, ARM VPS).

Q: How much disk space does OpenClaw need?About 500MB for the base installation. Add more if using local models through Ollama (models range from 4GB to 40GB+).

Q: Can I run multiple OpenClaw instances?Yes, but each needs its own configuration directory and port. Useful for separating work and personal agents.

Q: Is Docker supported?Community Docker images exist, but the official recommendation is native installation for the best experience.


from Anakin Blog http://anakin.ai/blog/how-to-install-openclaw-any-platform/
via IFTTT

How AI Agent Memory Systems Work: A Complete Guide to Context Management

TL;DR

How AI Agent Memory Systems Work: A Complete Guide to Context Management

AI agent memory systems store and retrieve conversation history, user preferences, and contextual information to maintain coherent, personalized interactions across sessions. These systems use vector databases, semantic search, and retrieval mechanisms to give agents long-term memory—turning stateless LLMs into context-aware assistants that remember past conversations and learn from interactions.

Introduction

You're chatting with an AI assistant about your project requirements. The conversation flows naturally—the agent remembers what you discussed five messages ago, recalls your preferences from last week, and builds on previous context without you repeating yourself.

This isn't magic. It's memory systems.

Most developers don't realize that LLMs like GPT-4 and Claude are stateless. They don't remember anything between API calls. Every conversation starts from scratch unless you build a memory layer.

That's where AI agent memory systems come in. They bridge the gap between stateless models and context-aware assistants that feel like they're paying attention.

In this guide, you'll learn how memory systems work, why they're critical for AI agents, and how to build them using Anakin's no-code workflow builder. Whether you're building a customer support bot, a personal assistant, or an autonomous agent, understanding memory architecture is essential.

Why AI Agents Need Memory

The Stateless Problem

Large language models process text in isolation. When you send a prompt to GPT-4, it doesn't know about your previous conversation unless you explicitly include that context in the current request.

This creates three major problems:

  1. No continuity - Users have to repeat information across sessions
  2. Context limits - You can't fit entire conversation histories into prompts (most models cap at 8K-128K tokens)
  3. No personalization - The agent can't learn user preferences or adapt behavior over time

What Memory Systems Solve

A well-designed memory system gives your AI agent:

  • Conversation continuity - Remember what was discussed 10 messages ago or last Tuesday
  • User personalization - Store preferences, communication style, and domain-specific knowledge
  • Efficient context management - Retrieve only relevant information instead of dumping entire histories
  • Task continuity - Pick up multi-step workflows where they left off
  • Knowledge accumulation - Build domain expertise from repeated interactions

Think of it like the difference between talking to someone with amnesia versus someone who remembers your relationship history. Memory transforms AI from a tool you use into an assistant you work with.

How AI Agent Memory Systems Work

The Basic Architecture

AI agent memory systems have three core components:

1. Storage Layer

This is where conversation data lives. Common approaches include:

  • Vector databases (Pinecone, Weaviate, Milvus) - Store embeddings for semantic search
  • Traditional databases (PostgreSQL, MongoDB) - Store structured conversation logs
  • Hybrid systems - Combine both for different memory types

2. Retrieval Mechanism

When the agent needs context, it queries the storage layer. Retrieval methods include:

  • Semantic search - Find contextually similar past conversations using embeddings
  • Keyword matching - Search for specific terms or entities
  • Recency filtering - Prioritize recent interactions
  • Relevance scoring - Rank memories by importance to the current query

3. Context Assembly

The system takes retrieved memories and formats them into the LLM prompt. This involves:

  • Selecting the most relevant memories (you can't include everything)
  • Ordering them chronologically or by relevance
  • Formatting them in a way the model understands
  • Staying within token limits

The Memory Lifecycle

Here's what happens when a user sends a message to an AI agent with memory:

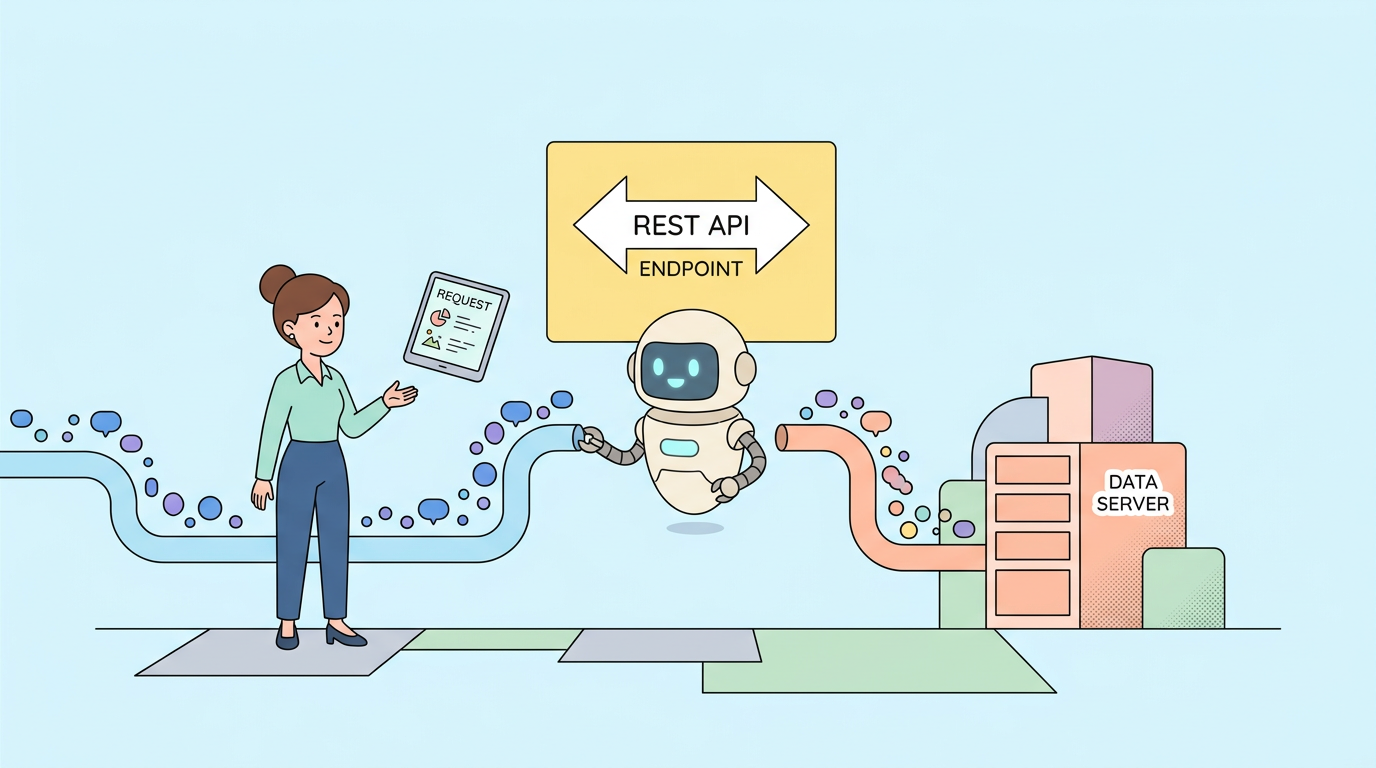
  1. User sends message - "What were the API endpoints we discussed?"
  2. Semantic search - System converts query to embedding, searches vector DB for similar past conversations
  3. Retrieve top matches - Finds 3-5 most relevant conversation snippets
  4. Assemble context - Formats retrieved memories + current message into prompt
  5. LLM generates response - Model processes full context and responds
  6. Store new interaction - Current exchange gets embedded and stored for future retrieval

This cycle repeats for every message, creating the illusion of continuous memory.

Types of Memory in AI Agents

Not all memory is created equal. AI agents use different memory types for different purposes:

Short-Term Memory (Working Memory)

This is the conversation buffer—the last 5-10 messages in the current session.

Characteristics:- Stored in application memory (RAM) - Fast access, no database queries needed - Cleared when session ends - Limited to recent context

Use case: Maintaining coherence within a single conversation thread.

Long-Term Memory (Episodic Memory)

Past conversations stored permanently for future retrieval.

Characteristics:- Stored in vector databases or traditional DBs - Persists across sessions - Searchable by semantic similarity - Can grow indefinitely (with proper management)

Use case: Remembering what you discussed last week or finding relevant past interactions.

Semantic Memory (Knowledge Base)

Facts, preferences, and learned information extracted from conversations.

Characteristics:- Structured data (user preferences, entity relationships) - Stored as key-value pairs or knowledge graphs - Updated incrementally as agent learns - Queried directly without semantic search

Use case: "User prefers Python over JavaScript" or "Company uses AWS infrastructure."

Procedural Memory (Skill Memory)

Learned behaviors and workflows the agent can execute.

Characteristics:- Stored as reusable functions or workflow templates - Triggered by specific intents or commands - Can be chained together for complex tasks - Improves through usage patterns

Use case: "When user asks for API documentation, fetch from internal wiki and format as markdown."

Building Memory Systems with Anakin

Anakin's visual workflow builder makes it easy to add memory to your AI agents without writing code. Here's how to build a memory-enabled agent step by step.

Step 1: Set Up Your Memory Storage

Anakin integrates with vector databases and supports built-in variable storage for simpler use cases.

For basic memory (session-based):

  1. Open Anakin's workflow designer
  2. Add a "Variable" node to store conversation history
  3. Configure it to append new messages to an array
  4. Reference this variable in your LLM prompt node

For advanced memory (persistent, semantic search):

  1. Connect Anakin to a vector database (Pinecone, Weaviate)
  2. Use the "API Integration" node to send embeddings
  3. Set up retrieval queries in your workflow
  4. Store embeddings of each conversation turn

Step 2: Create the Retrieval Logic

Add a workflow branch that searches memory before generating responses:

  1. Embed the user query - Use OpenAI's embedding API or similar
  2. Query vector DB - Search for top 3-5 similar past conversations
  3. Format results - Convert retrieved memories into readable context
  4. Inject into prompt - Add formatted memories to your LLM prompt template

Anakin's conditional nodes let you skip retrieval for simple queries that don't need historical context.

Step 3: Design Your Prompt Template

Your LLM prompt should include three sections:

System: You are a helpful AI assistant with memory of past conversations.

Relevant Past Context:
[Retrieved memories go here]

Current Conversation:
User: [Current message]
Assistant:

This structure helps the model distinguish between current input and historical context.

Step 4: Store New Interactions

After the LLM responds, store the new exchange:

  1. Combine user message + assistant response
  2. Generate embedding
  3. Save to vector DB with metadata (timestamp, user ID, session ID)
  4. Update session variables if using short-term memory

Anakin's workflow loops make this automatic—every message triggers the storage sequence.

Step 5: Add Memory Management

Prevent memory bloat with these strategies:

  • Summarization - Periodically compress old conversations into summaries
  • Relevance pruning - Delete low-relevance memories after 30 days
  • Token budgeting - Limit retrieved context to 2000 tokens max
  • User controls - Let users delete their memory or start fresh

You can schedule these cleanup tasks using Anakin's automation triggers.

Advanced Memory Techniques

Hierarchical Memory

Store memories at different granularity levels:

  • Message-level - Individual exchanges
  • Conversation-level - Entire session summaries
  • Topic-level - Aggregated knowledge about specific subjects

When retrieving, search all levels and combine results. This gives you both specific details and high-level context.

Memory Prioritization

Not all memories are equally important. Assign priority scores based on:

  • Recency - Recent conversations score higher
  • User feedback - Upvoted or bookmarked exchanges
  • Semantic relevance - How closely they match current query
  • Interaction frequency - Topics discussed repeatedly

Use weighted scoring to rank memories during retrieval.

Cross-Session Learning

Extract patterns across multiple users to improve the agent:

  • Identify common questions and pre-cache answers
  • Detect workflow patterns and suggest automations
  • Build a shared knowledge base from aggregated interactions
  • Train custom models on conversation data (with user consent)

This turns individual memories into collective intelligence.

Memory Compression

Long conversations exceed token limits. Compress them using:

  • Extractive summarization - Pull key sentences from conversations
  • Abstractive summarization - Use an LLM to rewrite conversations concisely
  • Entity extraction - Store only facts, decisions, and action items
  • Embedding-only storage - Keep embeddings but discard original text for old memories

Anakin's GPT-4 integration makes summarization easy—just add a summarization node to your workflow.

Common Challenges and Solutions

Challenge 1: Token Limit Overruns

Problem: Retrieved memories + current prompt exceed model's context window.

Solution:- Set hard limits on retrieved memory count (max 5 snippets) - Truncate old memories to first/last 100 tokens - Use summarization for conversations older than 7 days - Implement tiered retrieval (recent full text, old summaries)

Challenge 2: Irrelevant Memory Retrieval

Problem: Semantic search returns contextually similar but irrelevant memories.

Solution:- Add metadata filters (date range, topic tags, user intent) - Use hybrid search (semantic + keyword matching) - Implement relevance thresholds (discard results below 0.7 similarity) - Let users manually mark important memories

Challenge 3: Memory Staleness

Problem: Agent remembers outdated information (old preferences, deprecated workflows).

Solution:- Add "last updated" timestamps to memories - Implement memory versioning (track changes over time) - Periodically ask users to confirm stored preferences - Auto-expire memories after 90 days unless refreshed

Challenge 4: Privacy and Data Retention

Problem: Storing conversation data raises privacy concerns.

Solution:- Implement user-controlled memory deletion - Anonymize stored data (remove PII) - Encrypt memories at rest and in transit - Comply with GDPR/CCPA data retention policies - Offer "ephemeral mode" with no memory storage

Challenge 5: Cold Start Problem

Problem: New users have no memory, so the agent can't personalize.

Solution:- Use onboarding flows to collect initial preferences - Infer preferences from early interactions - Offer templates or presets for common use cases - Leverage shared knowledge base for general queries

Real-World Use Cases

Customer Support Agents

A SaaS company built a support agent with memory using Anakin. The agent:

  • Remembers past support tickets for each customer
  • Recalls product preferences and usage patterns
  • Retrieves relevant documentation based on customer's tech stack
  • Reduces repeat questions by 60%

Key memory features:- Long-term memory of all customer interactions - Semantic search across support ticket history - Integration with CRM for structured customer data

Personal Productivity Assistant

A freelancer uses an Anakin-powered assistant that:

  • Tracks ongoing projects and deadlines
  • Remembers client preferences and communication styles
  • Suggests relevant past work when starting new projects
  • Maintains a knowledge base of frequently used resources

Key memory features:- Hierarchical memory (project > task > subtask) - Cross-session learning to identify workflow patterns - User-controlled memory editing and deletion

Code Review Agent

A development team built a code review agent that:

  • Remembers team coding standards and style guides
  • Recalls past code review feedback for similar patterns
  • Tracks technical debt and suggests refactoring priorities
  • Learns from accepted/rejected suggestions

Key memory features:- Procedural memory of review workflows - Semantic memory of coding standards - Episodic memory of past reviews for context

Conclusion

AI agent memory systems transform stateless LLMs into context-aware assistants that remember, learn, and personalize. By combining vector databases, semantic search, and smart retrieval logic, you can build agents that feel like they're paying attention.

Here's what you need to remember:

  • LLMs are stateless—memory systems bridge the gap
  • Use vector databases for semantic search across past conversations
  • Implement multiple memory types (short-term, long-term, semantic, procedural)
  • Manage token limits with summarization and relevance filtering
  • Build memory-enabled agents easily with Anakin's visual workflow builder

FAQ

How much does it cost to run a memory-enabled AI agent?

Costs depend on your vector database provider and LLM usage. For a typical agent handling 1000 conversations/month: - Vector DB storage: $10-30/month (Pinecone, Weaviate) - Embedding API calls: $5-15/month (OpenAI embeddings) - LLM inference: $20-100/month depending on model choice

Anakin's credit system bundles these costs—150 free credits get you started, then pay-as-you-go pricing scales with usage.

Can I use memory systems with any LLM?

Yes. Memory systems work with any LLM (GPT-4, Claude, Gemini, open-source models). The memory layer is separate from the model—you're just adding context to prompts. Anakin supports all mainstream models, so you can switch between them while keeping the same memory architecture.

How do I handle memory for multi-user agents?

Use user IDs to partition memory. When retrieving context, filter by user_id so each user only sees their own memories. For team agents, you can implement shared memory pools with access controls. Anakin's workflow variables support user-scoped storage out of the box.

What's the difference between memory and RAG (Retrieval-Augmented Generation)?

RAG retrieves information from external knowledge bases (documentation, wikis). Memory retrieves past conversations and learned preferences. They're complementary—use RAG for factual knowledge, memory for personalization and context. Many agents combine both.

How long should I keep conversation memories?

It depends on your use case: - Customer support: 1-2 years (compliance requirements) - Personal assistants: Indefinitely (user-controlled deletion) - Temporary agents: Session-only (no persistent storage)

Implement tiered retention: keep recent memories in full, summarize older ones, and delete after your retention policy expires.

Can memory systems work offline?

Yes, if you use local vector databases (ChromaDB, FAISS) and local LLMs. However, most production systems use cloud-based vector DBs for scalability. Anakin's workflows can integrate with both cloud and local storage depending on your requirements.

How do I prevent memory poisoning (users injecting false information)?

Implement these safeguards: - Validate extracted facts before storing as semantic memory - Use confidence scores for learned information - Let users review and edit stored memories - Separate user-provided data from agent observations - Implement memory versioning to track changes

What's the best vector database for AI agent memory?

Popular choices: - Pinecone - Managed, easy to use, good for production - Weaviate - Open-source, flexible schema, self-hostable - Milvus - High performance, scales to billions of vectors - ChromaDB - Lightweight, good for prototyping

Anakin integrates with all of them via API nodes. Start with Pinecone for simplicity, migrate to self-hosted options if you need more control.


from Anakin Blog http://anakin.ai/blog/404/
via IFTTT

Monday, March 9, 2026

How to Use Compact API for Vector Databases

How to Use Compact API for Vector Databases

TL;DR: The Compact API helps you manage v2 in vector databases. Use RESTful HTTP requests with JSON payloads for efficient operations. Returns structured responses with status codes and execution times.

Why Compact Operations Matter for AI Applications

You're building an AI application that needs to work with vector embeddings. Your ML model generates high-dimensional vectors. You need to store them, search them, and manage them efficiently.

Traditional databases can't handle vector operations well. SQL databases don't support distance calculations. NoSQL stores lack vector-specific optimizations. File systems don't scale past thousands of vectors.

Vector databases solve this problem. But you need to know how to use their APIs properly.

This guide shows you how to use the Compact API for v2 operations. You'll see working code examples, learn about common mistakes, and discover performance optimization techniques.

We'll cover:

• How the Compact API works

• Request and response formats

• Code examples with Python

• Error handling strategies

• Performance optimization tips

• Common mistakes to avoid

By the end, you'll know how to use the Compact API in production applications.

The Challenge of Managing Vector Data

Working with vector embeddings at scale presents unique challenges. You can't use standard database operations.

Common Problems Developers Face

• Slow operations that don't scale past thousands of vectors

• Memory errors from loading too much data at once

• Lost data when operations fail halfway through

• Poor performance from missing optimizations

• Incorrect results from wrong configurations

Why Proper API Usage Matters

Your API calls determine your application's performance. Wrong approaches make operations 10-100x slower. Missing error handling loses data. Poor batching wastes compute resources.

A developer at a recommendation startup made single API calls in a loop. Processing 1 million vectors took 6 hours. They switched to batch operations. Time dropped to 20 minutes.

Another team didn't handle errors properly. When their job crashed halfway through, they lost 50,000 vectors. They had to re-run everything.

These problems are avoidable with proper API usage.

How the Compact API Works

The Compact endpoint accepts HTTP requests with JSON payloads. You send your parameters, the database processes them, and you get back structured responses.

Request Structure

Every request needs:

• Authentication header with your API key

• Content-Type set to application/json

• Request body with required parameters

• Optional timeout configuration for long operations

Response Format

Responses include:

• Status code (200 for success, 4xx/5xx for errors)

• Data payload with operation results

• Execution time for performance monitoring

• Error messages when something fails

The API uses standard REST conventions. POST for creates, GET for reads, DELETE for removals.

Best Practices for Production

Performance Optimization

• Use batch operations instead of single-item loops

• Set appropriate timeouts for long-running operations

• Reuse HTTP connections with connection pooling

• Monitor response times and set up alerts

• Cache results when appropriate

Error Handling

• Check status codes before parsing response bodies

• Use exponential backoff for retries

• Log failed requests with full context

• Handle rate limits with proper backoff

• Set up monitoring for error rates

Security

• Store API keys in environment variables, not code

• Use HTTPS for all requests

• Rotate keys regularly

• Set up IP allowlists when possible

• Never log API keys or sensitive data

Monitoring and Observability

• Track request latency and throughput

• Monitor error rates by status code

• Set up alerts for anomalies

• Log request IDs for debugging

• Use distributed tracing for complex workflows

Common Mistakes to Avoid

• Don't send requests without error handling

• Don't ignore rate limits

• Don't use production keys in development

• Don't skip input validation

• Don't forget to set timeouts

• Don't log sensitive data

• Don't retry indefinitely without backoff

Real-World Use Cases

An online retailer uses the Compact API to manage 10 million product embeddings. They process data in batches of 1000, use connection pooling, and implement retry logic. Operations complete in minutes instead of hours.

Content Recommendation

A media platform uses the API to update article embeddings daily. They run operations during off-peak hours, monitor performance metrics, and alert on failures. Their system handles 5 million articles reliably.

A photo app uses the API to manage 50 million image embeddings. They use batch operations, implement caching, and optimize for their query patterns. Search returns results in under 20ms.

Troubleshooting Common Issues

Timeout Errors

Your request times out before completing. Increase the timeout parameter or split large operations into smaller batches.

Authentication Failures

Your API key is invalid or expired. Check your key, ensure it's properly formatted, and verify it hasn't been revoked.

Rate Limit Errors

You're sending too many requests. Implement exponential backoff and respect rate limit headers in responses.

Invalid Parameter Errors

Your request parameters are incorrect. Check the API documentation for required fields and valid values.

Performance Benchmarks

Typical performance for the Compact API:

• Single operations: 10-50ms

• Batch operations (1000 items): 100-500ms

• Large batches (10000 items): 1-5 seconds

• Throughput: 1000-10000 operations per second

Your actual performance depends on data size, network latency, and database load.

Next Steps

You now know how to use the Compact API for v2 operations. You've seen working code examples, learned about error handling, and discovered performance optimization techniques.

Here's what to do next:

• Test the API with your own data

• Set up error monitoring and logging

• Optimize batch sizes for your workload

• Build retry logic into your application

• Monitor performance metrics

Want to build AI applications faster? Anakin AI provides tools for working with vector databases, managing embeddings, and deploying AI models. Start building today.

Frequently Asked Questions

What's the maximum batch size for Compact operations?

Most databases support batches of 1000-10000 items. Check your specific database documentation for limits.

How do I handle rate limits?

Implement exponential backoff when you receive 429 status codes. Respect rate limit headers in API responses.

Should I use connection pooling?

Yes. Connection pooling reduces latency and improves throughput for applications making many requests.

How long should I set my timeout?

Start with 30 seconds. Increase for large batch operations. Monitor actual execution times and adjust accordingly.

What happens if my request fails halfway through?

Most operations are atomic. Either the entire operation succeeds or it fails completely. Check your database's transaction support.


from Anakin Blog http://anakin.ai/blog/404/
via IFTTT

TTS API 지연 문제 해결 방법: 실전 최적화 가이드 2024

TL;DR: TTS API의 지연 문제는 스트리밍 오디오 출력, 응답 캐싱, 비동기 처리, 그리고 적절한 API 제공업체 선택을 통해 효과적으로 줄일 수 있습니다. TTS API 지연 문제란 무엇인가? 텍스트 음성 변환(TTS, Text-to-S...